

Quick answer: Porta cabin installation procedure step by step: site preparation, foundation, delivery, crane lifting, levelling, joining modules, utility connections.
Most porta cabin problems on site, such as doors that won’t close, leaking joints and cracked panels, come from poor installation rather than poor cabins. A clear installation procedure keeps the work safe and the cabin square, level and watertight. This guide sets out the standard steps used on UAE sites, in the order they happen, and can be used as the basis for a method statement.
Every site is different. Your contractor’s HSE plan, lifting plan and the client’s requirements always take priority.
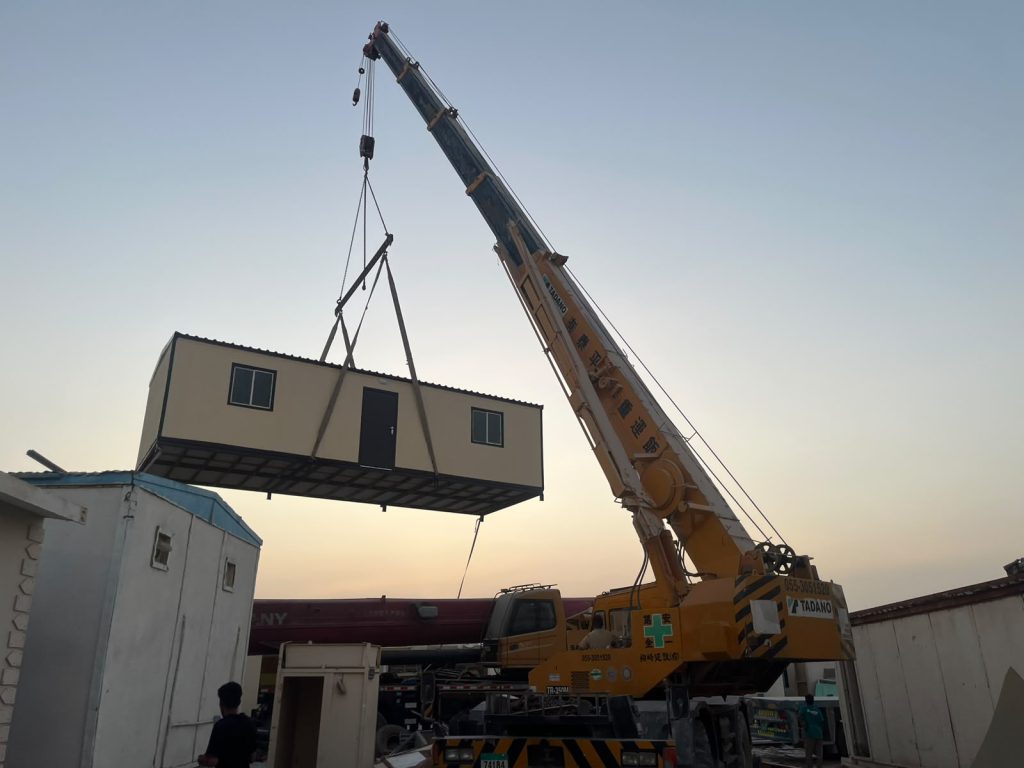
Step 1: Survey and Planning
- Confirm the cabin position, levels and orientation on the site plan
- Check access for the trailer and crane, including turning space, overhead lines and ground strength
- Locate water, drainage and power connection points
- Obtain site permits and any client, community or authority approvals
See permits and approvals for porta cabins.
Step 2: Site Preparation and Foundation
- Clear and level the area and compact the ground
- Build the foundation: concrete blocks or pads at the support points, strip footings, or a slab for larger buildings
- Check all supports are at the same level, since an uneven base twists the frame and jams doors
- Leave space for drainage falls and pipe routes
Step 3: Lifting Plan and Safety
- Prepare a lifting plan with the cabin weight, crane capacity and radius, and slings or spreader beam
- Use a certified crane, operator, rigger and banksman
- Inspect lifting gear and the cabin’s lifting points
- Barricade the lifting zone and keep people out from under the load
- Stop lifting in high winds

Step 4: Delivery and Offloading
- Inspect the cabin on arrival for transport damage
- Lift the cabin from the trailer using the designated lifting points
- Use tag lines to control the load
Step 5: Positioning and Levelling
- Lower the cabin onto the supports in the marked position
- Level it in both directions with shims, and check that doors and windows open freely
- Fix the cabin to the foundation where wind or the specification requires
Step 6: Joining Modules (Multi-Module and Double Storey)
- Align adjacent modules and bolt them together
- Seal roof and wall joints with flashing and sealant
- Install joint covers inside and finish the floor joints
- For double storey buildings, lift and bolt upper modules, then fit staircases and handrails. See double storey porta cabins.
Step 7: Utility Connections
- Electrical: a licensed electrician connects the incoming supply to the DB, with earthing and testing
- Water: connect to the mains or a tank, and check for leaks under pressure
- Drainage: connect to the sewer, septic or holding tank with correct falls
- AC: mount outdoor units securely, connect, test and drain condensate away from the cabin

Step 8: Finishing Works
- Fit steps, ramps, canopies and handrails at doors
- Install skirting around the base to keep out animals and sand where required
- Touch up any paint damaged during lifting
Step 9: Inspection and Handover
- Cabin level, doors and windows operating
- Roof and joints watertight
- Electrical tested, with lights, sockets and AC working
- Plumbing tested, with no leaks and drains flowing
- Fire extinguishers, alarms and signs in place where required
- Site cleaned and keys handed over
How Long Does Installation Take?
A single cabin on a prepared base is usually placed and connected in a few hours. Multi-module and double storey buildings take longer, depending on joints, staircases and services. Ask about relocation and maintenance when a project ends.
Installation by Bab Al Qasar
Our own team delivers, installs and connects every porta cabin we build, across all 7 emirates. Read the site office set-up checklist before your cabin arrives.
Get a free quotation. Call +971 52 475 5394, message us on WhatsApp or send your requirements. Our factory is at Sajaa Industrial Area, Al Sajaa, Sharjah, open Mon–Sat 8 AM–6 PM, Sun 8 AM–9 PM.
4.8/5 on Google from 6 reviews. Read our Google reviews · Leave a review